As an Amazon Associate, I earn from qualifying purchases.
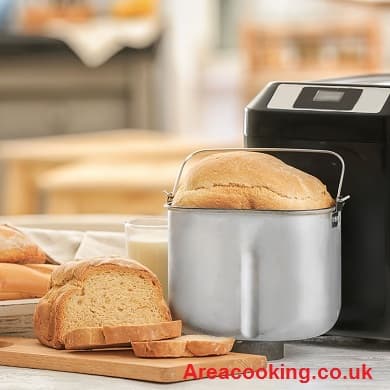
If you love the smell and taste of freshly baked bread, then a bread maker is a must-have appliance in your kitchen. Making bread at home not only saves you money but also allows you to customize your bread to your liking. In this article, we will provide a comprehensive guide on how to make bread in a bread maker.
Benefits of Making Bread in a Bread Maker
There are several benefits of making bread in a bread maker. Here are some of the main ones:
- Convenience: Making bread in a bread maker is much more convenient than making it by hand. You simply need to measure and add the ingredients, and the bread maker does the rest.
- Customization: With a bread maker, you can customize your bread to your liking. You can choose the type of flour, add different ingredients such as nuts or seeds, and adjust the crust settings to achieve the desired level of crispiness.
- Healthier Option: Homemade bread is generally healthier than store-bought bread, as you have control over the ingredients and can avoid additives and preservatives.
What You Need to Make Bread in a Bread Maker
Before you start making bread in a bread maker, you will need the following ingredients and equipment:
- Flour: You can use all-purpose flour, whole wheat flour, or a combination of both.
- Yeast: Active dry yeast or instant yeast are both suitable for bread making.
- Liquid: You will need water or milk, depending on the recipe.
- Sweetener: Sugar or honey can be used as a sweetener.
- Fat: Butter, margarine, or oil can be used as a fat.
- Salt: Salt is essential for flavor and helps to control the rise of the bread.
- Bread Maker: A bread maker with the appropriate settings is needed to make bread.
Contents
How To Make Bread In A Bread Maker: Step-By-Step Guide
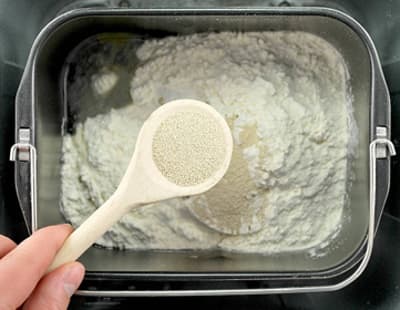
Now that you have all the ingredients and equipment, let’s get started on making bread in a bread maker.
Step 1: Gather Your Ingredients
Before you start, make sure you have all the ingredients measured and ready to go. The recipe will typically specify the exact amounts of each ingredient needed.
Step 2: Measure And Add Ingredients To The Bread Maker
Once you have gathered all the ingredients, measure and add them to the bread maker in the order specified in the recipe. Typically, the liquid ingredients are added first, followed by the dry ingredients.
Step 3: Select The Appropriate Settings
Select the appropriate settings on the bread maker, such as the type of bread you want to make, the crust colour, and the loaf size. The settings may vary depending on the make and model of your bread maker, so refer to the user manual for specific instructions.
Step 4: Start The Bread Maker
Once you have selected the appropriate settings, start the bread maker. The machine will start mixing and kneading the dough, allowing it to rise and bake.
Step 5: Wait For The Bread to Bake
The bread maker will take anywhere from 2 to 4 hours to bake the bread, depending on the type of bread and the settings you have selected. It’s important not to open the lid of the bread maker while the bread is baking, as this can affect the rising process and the texture of the bread.
Step 6: Remove The Bread From The Bread Maker
Once the bread maker has finished baking the bread, carefully remove the bread pan from the machine and let it cool on a wire rack for a few minutes. Then, remove the bread from the pan and let it cool completely before slicing and serving.
Tips For Making Perfect Bread In A Bread Maker
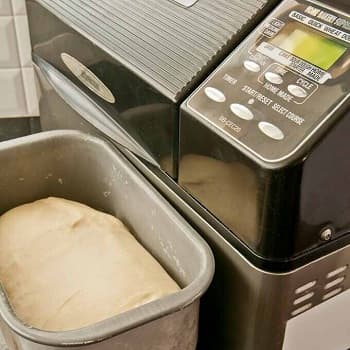
Here are some tips to help you make perfect bread in a bread maker:
- Use fresh ingredients: Fresh ingredients, especially yeast, will help your bread rise properly and have a better texture.
- Measure ingredients accurately: It’s important to measure your ingredients accurately to ensure your bread turns out well.
- Use the appropriate flour: Different types of flour will produce different textures of bread. Experiment with different types of flour to find the one that suits your taste.
- Don’t overcrowd the bread maker: Make sure you don’t add too much flour or liquid to the bread maker, as this can affect the rising process and the texture of the bread.
- Add ingredients in the correct order: The order in which you add the ingredients is important for the bread maker to work properly.
Troubleshooting Common Bread Maker Problems
If you encounter any problems with your bread maker, here are some common issues and how to troubleshoot them:
- Bread is too dense: This could be due to too much flour or not enough liquid. Try adjusting the recipe accordingly.
- Bread does not rise properly: This could be due to using old yeast or adding too much salt. Make sure you use fresh ingredients and measure them accurately.
- Bread is too dry: This could be due to using too much flour or not enough liquid. Try adjusting the recipe accordingly.
FAQs
Can I use gluten-free flour in a bread maker?
Yes, many bread makers have a gluten-free setting. Follow the instructions in your bread maker’s manual for the best results.
Can I make dough in a bread maker?
Yes, many bread makers have a dough setting that allows you to make dough for pizza, rolls, and other baked goods.
How long does it take to make bread in a bread maker?
The time it takes to make bread depends on the type of bread and the settings you choose. Most bread makers take between 2-4 hours to make bread.
Can I add nuts or raisins to my bread?
Yes, you can add nuts, raisins, and other ingredients to your bread. Follow the instructions in your bread maker’s manual for the best results.
Can I use a bread maker to make gluten-free bread?
Yes, many bread makers have a gluten-free setting. Follow the instructions in your bread maker’s manual for the best results.
Best Gluten Free Bread Maker UK 2023 – Top 8 Rating & Reviews
Conclusion
Making bread in a bread maker is a convenient and easy way to enjoy freshly baked bread at home. By following the steps outlined in this guide and experimenting with different ingredients and settings, you can create delicious and healthy bread that’s customized to your liking.
